(2024.06.30. 수정됨.)
사용 환경
OS : Windows 10
python : python 3.10.11
django : Djajgno 5.0.6
주요 파일 경로
blog
|- entry
|  |- views.py
|  |- urls.py
|  |- forms.py
|  |- models.py
|- templates/
   |- post.html
이전 글에서 포스팅을 위한 모델을 작성했으니 이번에는 모델을 통해 글을 작성하고, 수정하고, 삭제하는 작업을 구현해볼 겁니다.
영어권에서 글 작성과 조회, 수정과 삭제는 영어로 Create, Read, Update, Delete라는 단어에서 착안해 CRUD라는 명칭으로 불립니다.
글 조회와 작성 구현하기
글 작성을 위한 폼 생성하기
entry app에 forms.py를 다음과 같이 작성해줍니다.
forms는 관리자 페이지가 아니더라도 model에 데이터를 전달할 수 있도록 해줍니다.
# entry/forms.py
from django import forms
from .models import Post
class Form(forms.ModelForm):
    class Meta:
        model = Post
        fields = '__all__'
글 조회와 작성, 저장 코드 작성하기
글 작성과 작성한 글을 저장하기 위한 post와 save 함수를 작성합니다.
# entry/views.py
from django.http.request import HttpRequest
from django.shortcuts import render, redirect, get_object_or_404
from django.views.decorators.csrf import csrf_protect
from .models import Post
from .forms import Form
def index(request: HttpRequest):
    ....
# 글 작성 페이지를 구현하는 코드
def post(request: HttpRequest):
    context = {}
    context.update({
        'title': '글 작성하기',
        'form': Form(),
    })
    return render(request, 'post.html', context)
# 작성한 글을 저장하는 코드
@csrf_protect
def save(request: HttpRequest):
    context = {}
    form = Form(data=request.POST)
    if form.is_valid():
        Object: Post = form.save()
        return redirect(f'/entry/{Object.pk}/')
    context.update({
        'title': '글 작성하기',
        'form': form,
    })
    return render(request, 'post.html', context)
# 개별 글 페이지를 만들어주는 코드
def detail(request: HttpRequest, pk: int):
    context = {}
    context.update({
        'object': get_object_or_404(Post, pk=pk),
    })
    return render(request, 'detail.html', context)
get_object_or_404
get_object_or_404는 object를 가져오지 못하면 http 404 응답을 보내는 코드입니다.
다음과 동일한 작업을 합니다.
try: Post.obejct.get(pk=pk)
except: raise {http 404 응답}
redirect
redirect는 단어 그대로 특정 url로 리다이렉트를 수행합니다.
csrf token
{% csrf_token %}은 CSRF 토큰을 뜻합니다.
CSRF란, Cross Site Request Forgery protection의 약자로 사이트 간 요청 위조 공격을 방지하기 위해 사용하는 토큰입니다.
사이트 공격을 방지하기 위해 사용하는 안전장치라고 알아두면 됩니다.
@csrf_protect
전달받은 요청에 포함된 csrf 토큰의 유효성을 검사하는 데코레이터입니다.
url 할당하기
entry app의 urls.py에 글 작성, 저장, 개별 글 페이지 url을 할당해줍니다.
url 끝에 slash(/)를 포함하도록 합니다. 장고는 non-slash url과 slash url을 서로 다른 url로 인식하기 때문입니다.
# entry/urls.py
from django.urls import path
from . import views
urlpatterns = [
    path('', views.index),
    path('post/', views.post), # 글 작성 url
    path('post/save/', views.save), # 글 저장 url
    path('<int:pk>/', views.detail), # 개별 글 페이지 url
]
<int:pk>
개별 글 페이지 url을 보면 url path에 <int:pk>가 사용되었습니다.
이는 detail 함수를 호출할 때, pk라는 arg를 int type으로 전달하겠다는 뜻입니다.
글 작성 페이지에서 사용할 템플릿 작성하기
# templates/post.html
<head></head>
<body>
    <h1>{{ title }}</h1>
    <article>
        <form method="post" action="/entry/{% if not pk %}post/{% else %}{{ pk }}/{% endif %}save/">
            {% csrf_token %}
            {{ form }}
            <input type="submit" value="저장하기">
        </form>
    </article>
</body>
글 조회 페이지 템플릿 만들기
# templates/detail.html
<head></head>
<body>
    <h1>{{ object.title }}</h1>
    <a href="/entry/{{ object.pk }}/edit/">글 수정하기</a>
    <a href="/entry/{{ object.pk }}/delete/">글 삭제하기</a>
    <article>
        <div>
            {{ object.content|safe }}
        </div>
    </article>
</body>
글 작성과 조회해보기(Create, Read)
시험삼아 글을 하나 작성해봅시다.
글을 작성하면 개별 글 페이지로 리다이렉트 하도록 했으니 다음과 같은 화면을 확인할 수 있습니다.
글 목록 페이지를 확인해보면 작성된 글 목록을 확인할 수 있습니다.

글 수정 구현하기
글 수정과 삭제 구현
글 수정과 삭제를 구현하기 위한 코드를 views.py에 추가해줍니다.
# entry/views.py
from django.http.request import HttpRequest
from django.shortcuts import render, redirect, get_object_or_404
from django.views.decorators.csrf import csrf_protect
from .models import Post
from .forms import Form
def index(request: HttpRequest):
    ...
def post(request: HttpRequest):
    ...
@csrf_protect
def save(request: HttpRequest, pk: int=None):
    context = {}
    form = Form(data=request.POST, instance=get_object_or_404(Post, pk=pk) if pk else None)
    if form.is_valid():
        Object: Post = form.save()
        return redirect(f'/entry/{Object.pk}/')
    context.update({
        'title': '글 작성하기' if not pk else '글 수정하기',
        'form': form,
    })
    return render(request, 'post.html', context)
def detail(request: HttpRequest, pk: int):
    ...
# 글 수정 페이지 코드
def edit(request: HttpRequest, pk: int):
    context = {}
    context.update({
        'title': '글 수정하기',
        'form': Form(instance=get_object_or_404(Post, pk=pk)),
        'pk': pk,
    })
    return render(request, 'post.html', context)
# 글 삭제 코드
def delete(request: HttpRequest, pk: int):
    get_object_or_404(Post, pk=pk).delete()
    return redirect('/entry/')
글 수정 url과 글 삭제 url 할당
다음과 같이 글을 수정하거나 삭제할 때 사용할 url 패턴을 추가합니다.
이전과 마찬가지로 url 끝에 슬래시를 붙여주도록 합니다.
from django.urls import path
from . import views
urlpatterns = [
    path('', views.index),
    path('post/', views.post),
    path('post/save/', views.save),
    path('<int:pk>/', views.detail),
    path('<int:pk>/edit/', views.edit), # 추가
    path('<int:pk>/save/', views.save), # 추가
    path('<int:pk>/delete/', views.delete), # 추가
]
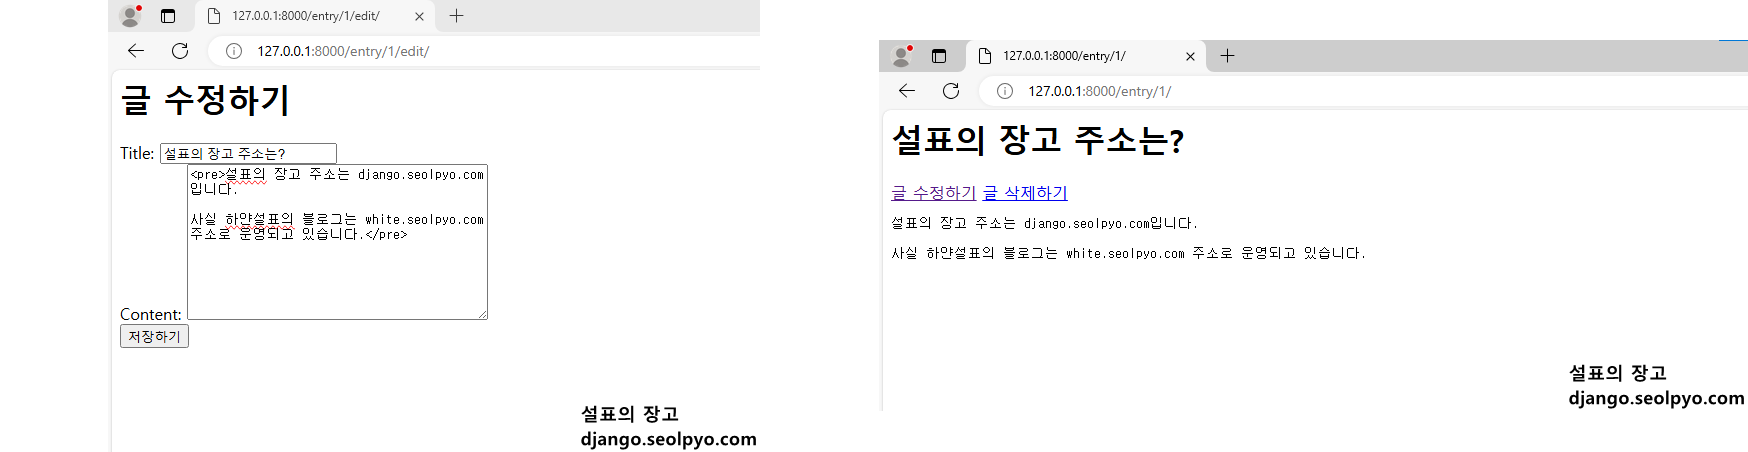
글 수정해보기(Update)
이제 다음과 같이 작성된 포스팅을 수정할 수 있습니다.
글 삭제해보기(Delete)
글을 삭제해봅시다.
앞서 작성한 코드를 그대로 사용하고 있다면 글을 삭제한 다음, 글 목록 페이지로 리다이렉트 됩니다.
.delete() method를 사용하는 경우 db에 저장된 데이터를 삭제하게 됩니다.
이 글의 댓글 기능은 일부러 막아놓았습니다. 궁금한 내용이 있다면 게시판을 이용해주세요!