(2024.06.30. 수정됨.)
사용 환경
OS : Windows 10
python : python 3.10.11
django : Djajgno 5.0.6
주요 파일 경로
blog
|- manage.py
|- config
|  |- settings.py
|  |- urls.py
|  |- views.py
|- entry
|  |- urls.py
|  |- views.py
|  |- models.py
|- templates
   |- index.html
app 생성하기
장고에서는 프로젝트에서 사용 가능한 하위 디렉토리를 "app"이라는 명칭으로 부릅니다.
"django-admin startapp {app 이름}" 명령을 통해 기초 app 파일이 들어있는 디렉토리(폴더)를 생성할 수 있습니다.
entry라는 이름의 app을 만들어보겠습니다.
# app 생성
(python3.10) C:\seolpyo\python3.10\Django\blog>django-admin startapp entry
Model 생성하기
장고에서는 db를 읽는 object를 Model이라고 부릅니다.
Model에 설정된 variable에 맞춰 db에 테이블과 칼럼이 생성됩니다.
만들어진 entry app의 models.py를 다음과 같이 수정하여 포스트 모델을 만들어줍니다.
# entry/models.py
from django.db import models
class Post(models.Model):
    title = models.CharField(max_length=30,)
    content = models.TextField(max_length=999, default='',)
마이그레이션 생성 및 마이그레이트
모델을 생성하거나, 모델의 내용이 수정되었다면 반드시 마이그레이션과 마이그레이트를 진행해주어야 합니다.
db에 존재하는 테이블이나 칼럼이 모델의 내용과 다르다면 db에 저장된 데이터를 가져올 수 없기 때문입니다.
마이그레이션 명령어는 makemigrations입니다.
# 마이그레이션 생성
(python3.10) C:\seolpyo\python3.10\Django\blog>python manage.py makemigrations
Migrations for 'entry':
  entry\migrations\0001_initial.py
    - Create model Post

# 마이그레이트
(python3.10) C:\seolpyo\python3.10\Django\blog>python manage.py migrate
Operations to perform:
  Apply all migrations: admin, auth, contenttypes, entry, sessions
Running migrations:
  Applying entry.0001_initial... OK
url 할당하기
app 등록하기
entry app이 생성되고, app에서 사용할 모델이 작성되었으니 이를 확인할 수 있는 url을 할당해주어야 합니다.
가장 먼저 할 것은 설정 파일에 새로 만든 app을 추가해주는 것입니다.
INSTALLED_APPS를 찾아 app의 디렉토리명을 추가해줍니다. 삽입 위치는 크게 상관없습니다.
# config/settings.py
...
INSTALLED_APPS = [
    ...
    'entry', # 추가
    ...
]
...
url pattern 추가하기
그 다음은 url을 등록해줘야 합니다.
path와 include 함수를 사용하여 /entry/ 디렉토리로 접근하는 모든 url을 entry app의 urls.py에서 제어할 수 있도록 할 수 있습니다.
url 끝에 slash(/)를 포함하도록 합니다. 장고는 non-slash url과 slash url을 서로 다른 url로 인식하기 때문입니다.
# config/urls.py
from django.contrib import admin
from django.urls import path, include
from . import views
urlpatterns = [
    path('admin/', admin.site.urls),
    path('', views.home),
    path('entry/', include('entry.urls',)), # 추가
]
홈페이지 view 변경하기
겸사겸사 앞서 작성한 홈페이지 view에 entry 디렉토리로 이동할 수 있는 링크를 삽입합니다.
# config/views.py
from django.http.request import HttpRequest
from django.shortcuts import render
def home(request: HttpRequest):
    # entry 디렉토리 이동 url 추가
    return render(request, template_name='home.html', context={'title': '하얀설표의 블로그', 'content': '<p>하얀설표의 블로그 홈페이지입니다.</p><p><a href="/entry/">글 목록</a></p>'})
entry url 작성하기
우선 글 목록을 볼 수 있는 페이지만 구현할 수 있도록 합니다.
# entry/urls.py
from django.urls import path
from . import views
urlpatterns = [
    path('', views.index),
]
글 목록 뷰 구현하기
그 다음, entry app의 views.py를 다음과 같이 수정하여 글 목록을 요청하는 경우 수행할 작업을 입력해줍니다.
# entry/views.py
from django.http.request import HttpRequest
from django.shortcuts import render
from .models import Post
def index(request: HttpRequest):
    context = {}
    context.update({
        'title': '글 목록',
        'objects': Post.objects.all(),
    })
    return render(request, 'index.html', context)
Post.objects.all()
Post.objects.all()은 Post Model에 해당하는 모든 데이터를 불러온다는 뜻입니다.
템플릿 작성하기
마지막으로 글 목록 응답에 사용할 index.html을 작성해줍니다.
장고는 {% for {iterator} %}~{% endfor %} 명령어를 통해 loop를 구현할 수 있으며, for loop 중간에 존재하는 {% empty %} 명령어는 루프하지 못할 경우 수행하는 작업입니다.
# templates/index.html
<head></head>
<body>
    <h1>{{ title }}</h1>
    <a href="/entry/post/">글 작성하기</a>
    <article>
        {% for object in objects %}
        <a href="/entry/{{ object.pk }}">{{ object.title }}</a>
        {% empty %}
        <p>작성된 글이 없습니다.</p>
        {% endfor %}
    </article>
</body>
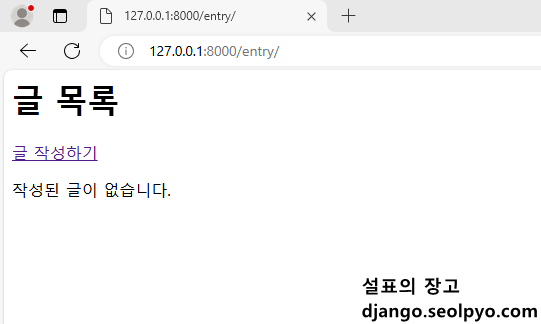
확인해보기
/entry/ 디렉토리에 접근하면 다음과 같이 작성된 글이 없다는 페이지를 확인할 수 있습니다.
이 글의 댓글 기능은 일부러 막아놓았습니다. 궁금한 내용이 있다면 게시판을 이용해주세요!