(수정됨: 2024.07.27(KST))
환경
OS : Windows 10
python : 3.10.11
Django : 5.0.7
주요 파일 경로
mysite/
|- config/
|   |- urls.py
|- static/
|   |- style.css
|- templates/
    |- base.html
읽기 전에
이 글을 보고 따라하는 것이 목적이라면, 이전 글을 보고 동일한 환경을 갖춘 상태에서 시도하시길 바랍니다.
style.css 적용방법
지난 글에서 게시판 CRUD 기능을 구현하며 대략적인 style도 함께 적용했습니다.
그러나 여전히 미관적인 부분이 많기 때문에, style.css 파일을 만들어 적용해보겠습니다.
style.css 작성하기
장고프로젝트를 생성하며 함께 만들었던 static 폴더에 다음과 같은 내용으로 style.css를 만듭니다.
# static/style.css
// code by 하얀설표(https://django.seolpyo.com/)

body {
    max-width: 1100px;
    width: 100%;
    margin-left: auto !important;
    margin-right: auto !important;
}
body > * {
    padding-left: 10px;
    padding-right: 10px;
}
main {
    min-height: 60vh;
}
a, .member {
    font-size: 18px;
}
nav input[type=submit] {
    font-size: 15px;
}
input[type=submit] {
    cursor: pointer;
}


table.list {
    width: 100%;
    text-align: center;
    font-size: 19px;
}
table.list thead {
    background-color: #000;
    color: #fff;
}
tr > * {
    padding-top: 5px;
    padding-bottom: 5px;
}
table.list tbody tr:nth-child(2n) {
    background-color: #00000008;
}
table.list a {
    float: left;
    text-align: start;
}
div.page {
    place-content: center;
}
div.page > * {
    display: inline-block;
    font-size: 18px;
}


.title {
    margin-top: 20px;
}
.title, input[name=title] {
    font-size: 22px;
    line-height: 26px;
}
.info {
    margin-top: 10px;
    font-size: 17px;
}
.info > * {
    margin-right: 20px;
}
.content {
    font-size: 19px;
    margin-top: 10px;
    margin-bottom: 40px;
}
.comments a {
    font-size: 17px;
}
[id^=comment] {
    padding: 20px 10px;
}
[id^=comment] form {
    margin-bottom: 0;
}
[id^=comment] .content {
    font-size: 17px;
    margin-top: 5px;
    margin-bottom: 10px;
}
[id^=comment] .date {
    font-size: 14px;
    color: #777;
}
[id^=comment] input[type=submit] {
    font-size: 15px;
}


input, textarea {
    font-size: 17px;
}
input[type=text], input[type=email], input[type=password], textarea {
    width: 100%;
}
static url 추가하기
config 폴더의 urls.py 하단에 다음과 같이 static url pattern을 추가합니다. 추가하는 김에 media url pattern도 함께 추가합니다.
if문을 이용해 "settings.DEBUG"를 확인하는 이유는, 서버에서 배포하는 경우에는 다른 방법으로 static file을 제공하기 때문입니다.
따라서 이 방법은 DEBUG 모드에서만 사용됩니다.
# config/urls.py
# code by 하얀설표(https://django.seolpyo.com/)

from django.conf import settings
from django.contrib import admin
from django.urls import path, include

urlpatterns = [
    ...
]

if settings.DEBUG: # 디버그 모드인지 확인
    from django.conf.urls.static import static
    urlpatterns += static(settings.STATIC_URL, document_root=settings.STATIC_ROOT) # static url 추가
    urlpatterns += static(settings.MEDIA_URL, document_root=settings.MEDIA_ROOT) # media url 추가
템플릿에 style.css 추가하기
이전에 작성한 base.html 최상단에 "{% load statict %}" 명령어를 추가하고, head 영역에 style.css를 가져오기 위한 태그를 작성합니다.
# templates/base.html

{# static url을 가져오기 위한 명령어 #}
{% load static %}
<html>
    <head>
        {# style.css 추가 #}
        <link rel="stylesheet" href="{% static 'style.css' %}">
    </head>
    ...
</html>
확인해보기
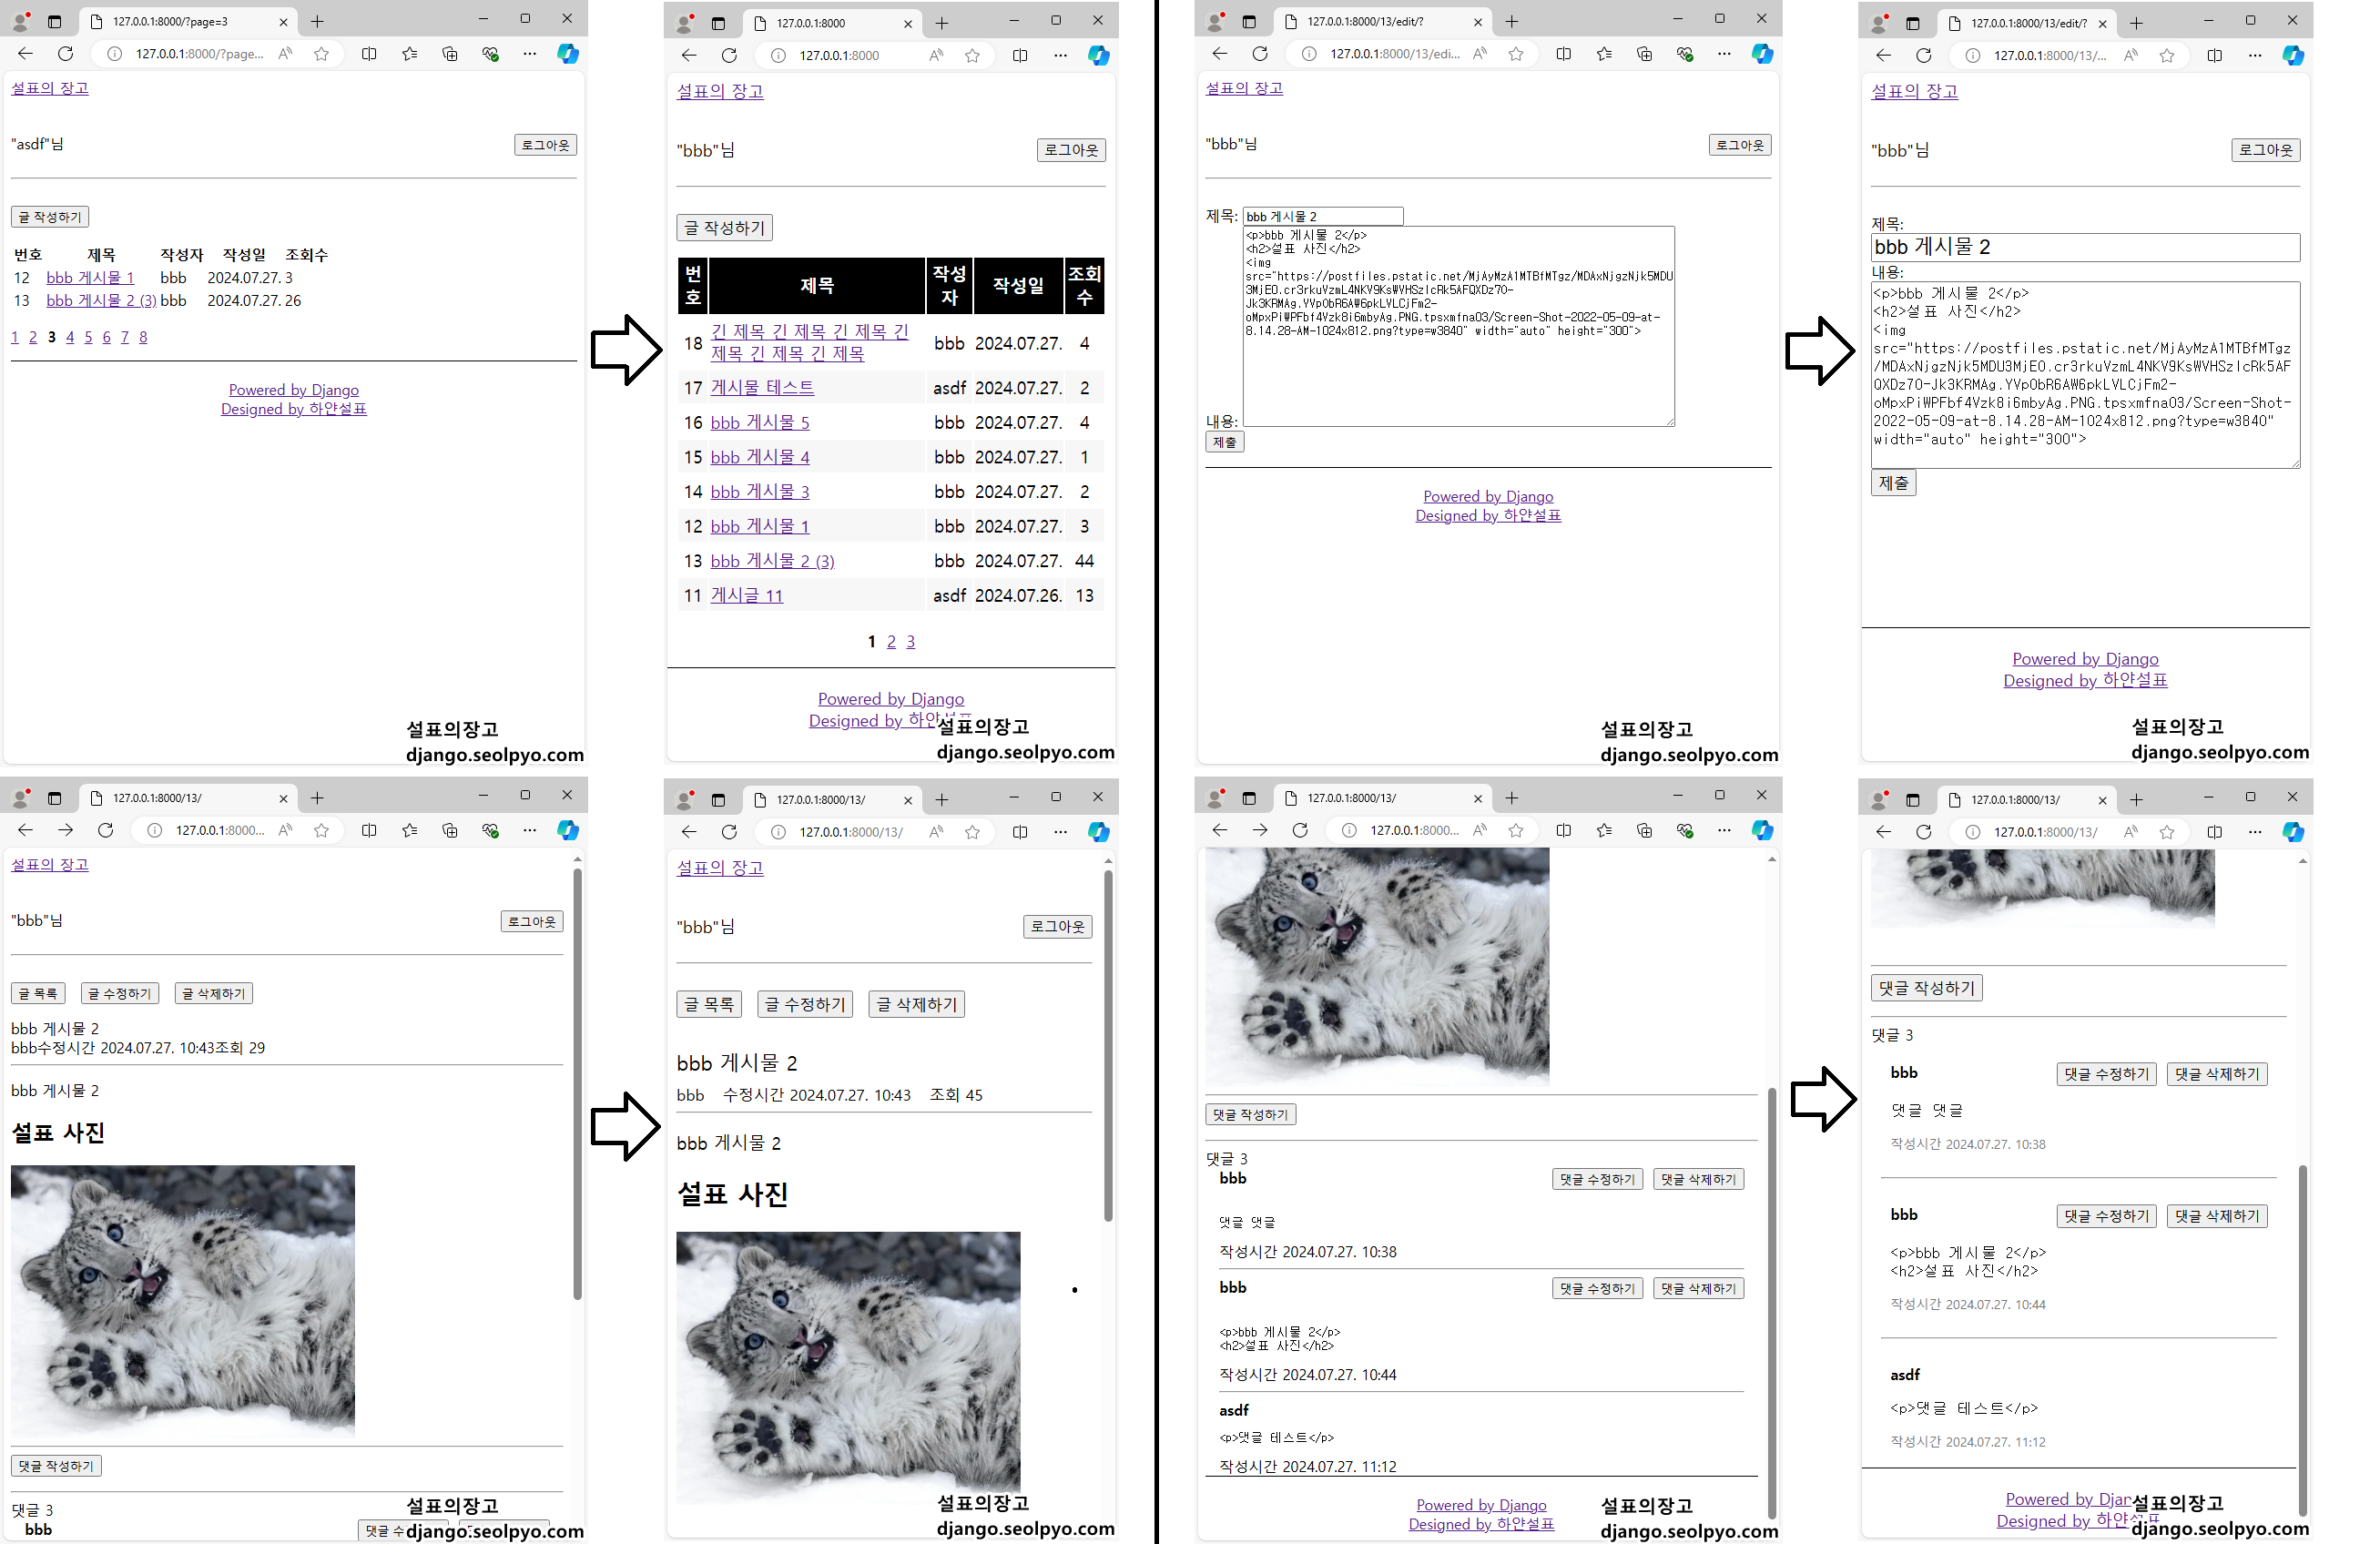
장고프로젝트를 실행시킨 다음, 접속하면 다음과 같이 css가 적용된 사이트를 확인할 수 있습니다.
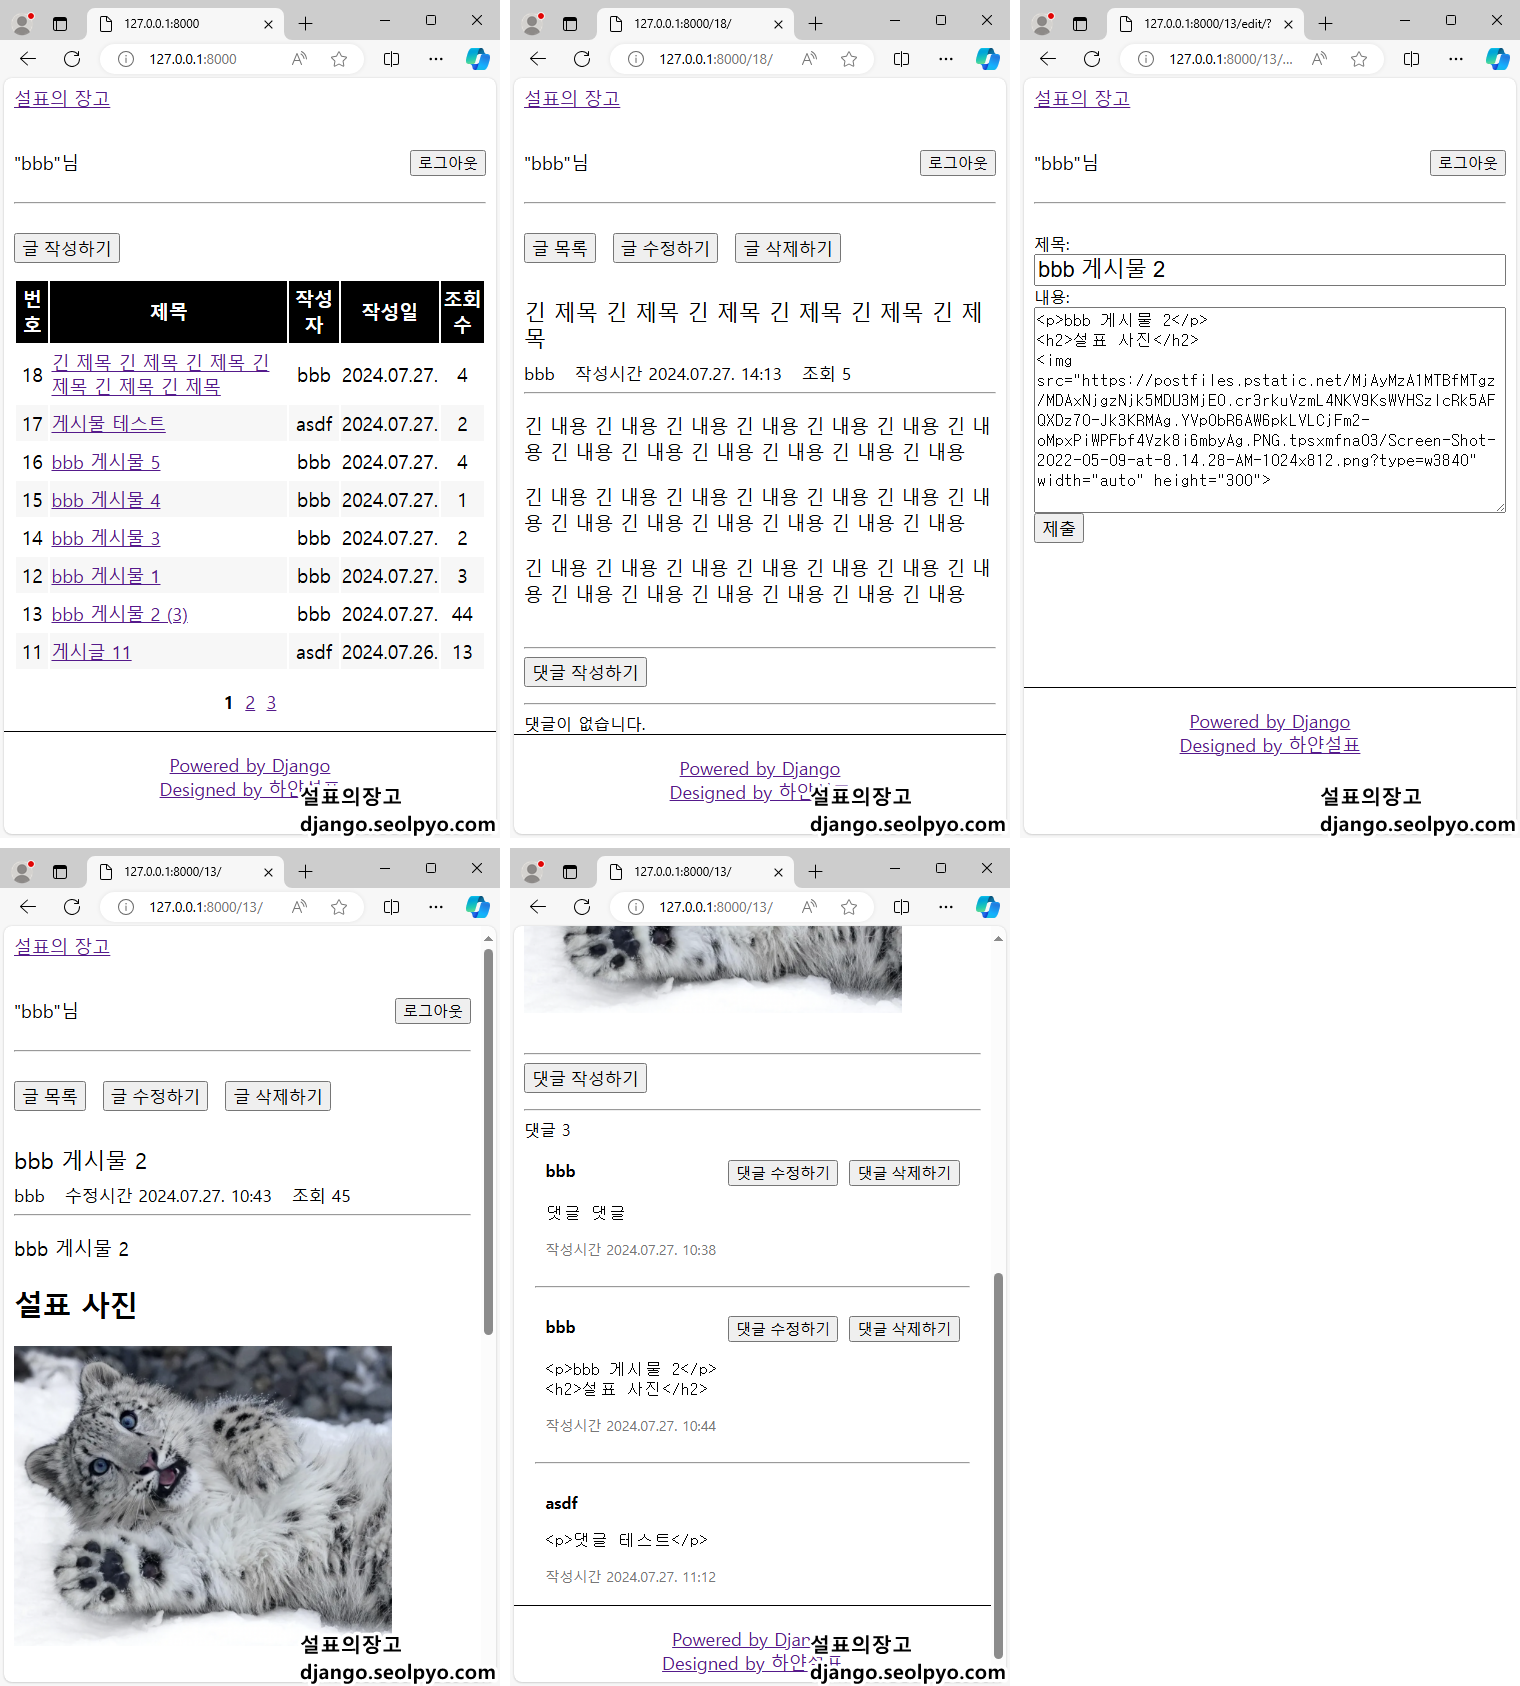
변경된 부분 비교해보기
변경된 부분은 다음과 같습니다.
완전히 깔끔해졌다고 할 수는 없지만, 그래도 이전보다는 보기 좋아졌습니다.